Kirsten A. Harr Photography Blog
|
Some of the links on this website are affiliate links, which means that I may earn a commission if you click on the link or make a purchase using the link. When you make a purchase, the price you pay will be the same whether you use the affiliate link or go directly to the vendor's website using a non-affiliate link. By using the affiliate links, you are helping support Kirsten A. Harr Photography, and I genuinely appreciate your support.
|
 Building a successful photography business requires a combination of photography skills, business acumen, marketing strategies, and dedication. The first key to building a successful photography business is to hone your photography skills.
Before you start a photography business, it's crucial to have a strong foundation in photography. Continuously practice and refine your skills to offer high-quality work to your clients. Improving your photography skills is a continuous journey that involves practice, learning, and experimentation. Here are some tips to help you enhance your photography: 1. Understand Your Gear: Familiarize yourself with your camera's settings, modes, and capabilities. This knowledge will empower you to make creative decisions and capture better images. 2. Learn the Basics of Composition: Composition is crucial in photography. Study concepts like the rule of thirds, leading lines, framing, symmetry, and balance. These principles can help you create visually appealing and engaging images. For more on this, read my crash course on composition basics. 3. Master Lighting: Learn how to work with different types of lighting, including natural light, artificial light, and low light situations. Understand concepts like golden hour, blue hour, and diffused light to create mood and depth in your images. 4. Practice Regularly: Photography is a skill that improves with practice. Dedicate time to shooting regularly, even if it's just in your everyday surroundings. Experiment with different angles, settings, and compositions. 5. Study Photography Techniques: Explore various photography techniques such as long exposure, macro photography, HDR (High Dynamic Range), and portrait lighting setups. Each technique adds a new dimension to your skill set. 6. Analyze and Critique Your Work: Review your photos critically to identify areas for improvement. Consider what worked well and what could be enhanced. Constructive self-critique helps you grow as a photographer. 7. Learn Post-Processing: Editing is an essential part of photography. Learn how to use editing software like Adobe Lightroom or Photoshop to enhance your images. However, remember to maintain a balance and avoid over-editing. 8. Study Other Photographers: Explore the work of established photographers in your chosen niche. Analyze their compositions, lighting choices, and editing styles to gain inspiration and insights. 9. Seek Feedback: Share your work with peers, mentors, or online photography communities. Constructive feedback can provide fresh perspectives and help you identify areas for improvement. 10. Experiment with Different Subjects: Don't limit yourself to just one type of subject. Experiment with various genres of photography to challenge yourself and expand your skills. 11. Understand Your Niche: If you have a specific photography niche, delve deep into it. Understand the expectations, styles, and trends within that niche to better cater to your target audience. 12. Work on Patience: Photography often requires waiting for the right moment, perfect lighting, or the ideal subject. Cultivate patience and be prepared to put in the time to capture exceptional shots. 13. Attend Workshops and Courses: Participate in photography workshops, online courses, and seminars. These resources provide structured learning and expose you to new techniques and perspectives. 14. Stay Inspired: Draw inspiration from various sources, such as art, literature, movies, and nature. Sometimes, stepping away from photography and experiencing other forms of creativity can spark fresh ideas. 15. Embrace Failure: Not every shot will be perfect, and that's okay. Embrace failures as opportunities to learn and grow. Analyze what went wrong and how you can avoid similar issues in the future. Remember that photography is a personal journey, and there's no set timeline for improvement. The key is to stay curious, open to learning, and dedicated to refining your craft over time.
0 Comments
 Taking better photos with your phone involves a combination of understanding fundamental photography principles, using your phone's camera features effectively, and practicing your skills. Here are some tips to help you take better photos with your phone:
Here are some additional resources to help you improve your phone photography!  Photographer: Kirsten A. Harr, Location: Al-Balad, Jeddah, Saudi Arabia We loved our visit to Al-Balad, Jeddah in Saudi Arabia. We fondly remember our time meandering through the old streets and admiring the beautiful architecture. 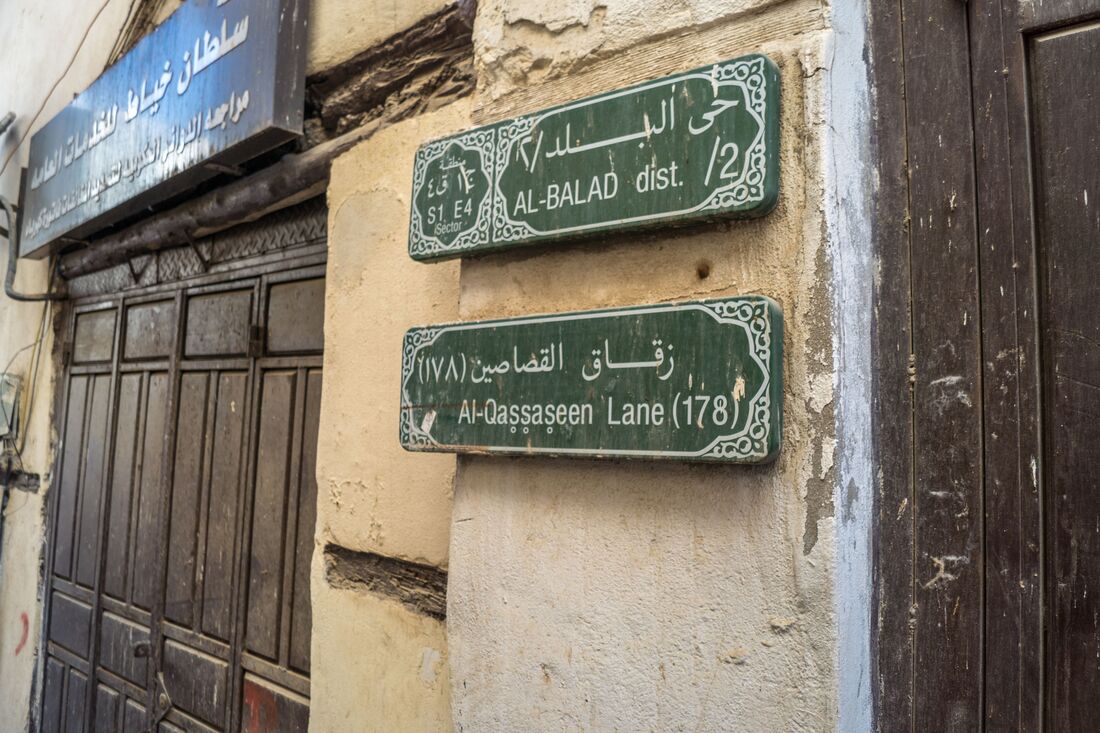 Photographer: Kirsten A. Harr, Location: Al-Balad, Jeddah, Saudi Arabia  Photographer: Kirsten A. Harr, Location: Al-Balad, Jeddah, Saudi Arabia Al-Balad, founded in the 7th century, is the historical center of Jeddah. Some buildings that remain in the town are made from corals from the nearby Red Sea, reinforced with limestone, and intricately decorated with teal, mahogany, and shisham brought from India and Africa as ships passed the port. Some of the old buildings in Al-Balad are more than 500 years old and have been preserved as a UNESCO World Heritage Site. 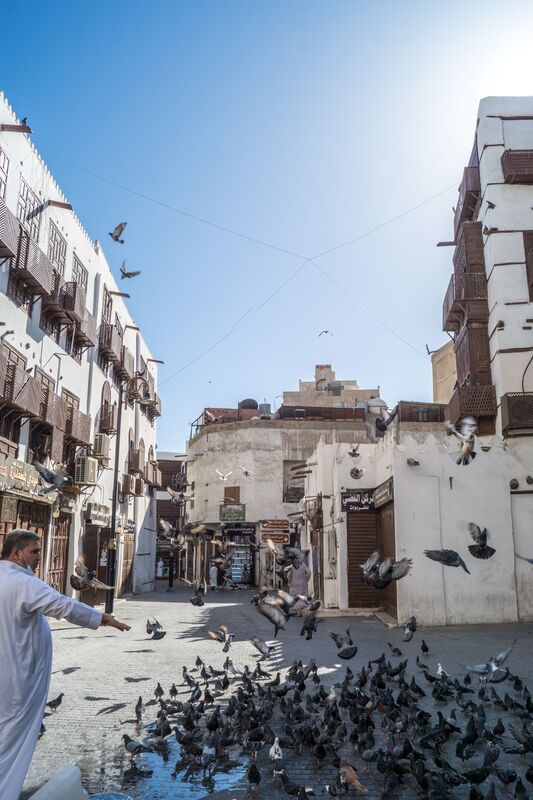 Photographer: Kirsten A. Harr, Location: Al-Balad, Jeddah, Saudi Arabia  Photographer: Kirsten A. Harr, Location: Al-Balad, Jeddah, Saudi Arabia When we visited, the streets were relatively barren which made for open spaces to walk and capture photos. But in the evening, the streets began to fill as the market doors opened.  Photographer: Kirsten A. Harr, Location: Al-Balad, Jeddah, Saudi Arabia 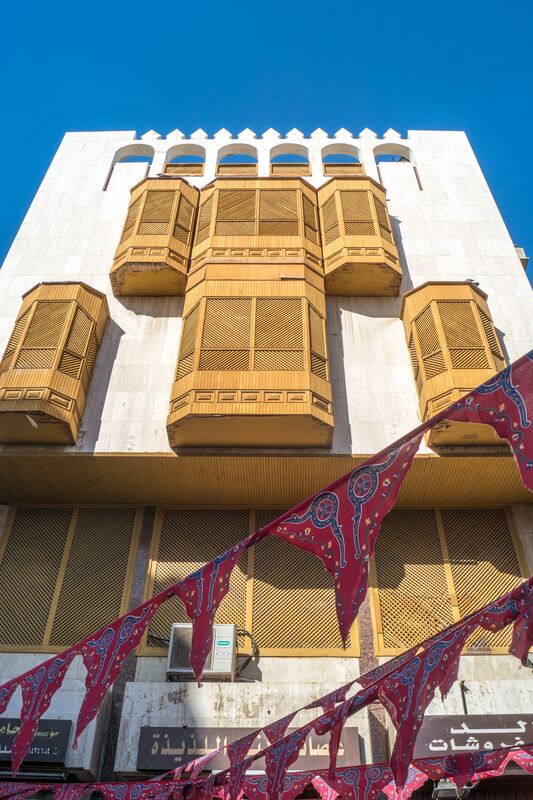 Photographer: Kirsten A. Harr, Location: Al-Balad, Jeddah, Saudi Arabia  The best camera for sports photography depends on various factors such as your budget, the type of sports you'll be shooting, your skill level, and your preferences. Here are some popular options that were known for their performance in sports photography: Canon EOS 1D X Mark III: This is a flagship camera from Canon known for its exceptional autofocus performance, high-speed shooting, and durability. It's favored by professional sports photographers. 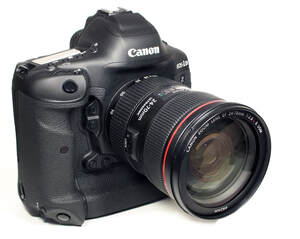 Canon EOS 1D X Mark III Nikon D6: Nikon's flagship sports camera, the D6, offers high-speed shooting, excellent low-light performance, and advanced autofocus capabilities, making it suitable for capturing fast-paced action. 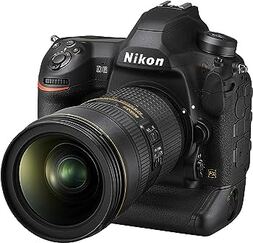 Nikon D6 Sony A9 II: Sony's A9 II mirrorless camera is renowned for its impressive autofocus system, blackout-free continuous shooting, and fast burst rates, making it a great choice for capturing sports action. 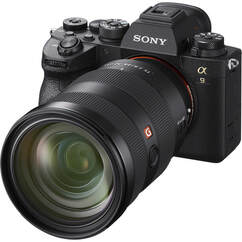 Sony A9 II Canon EOS 7D Mark II: While not as high-end as the 1D series, the 7D Mark II is a popular choice among enthusiasts and semi-professionals due to its fast autofocus, high burst rate, and rugged build. 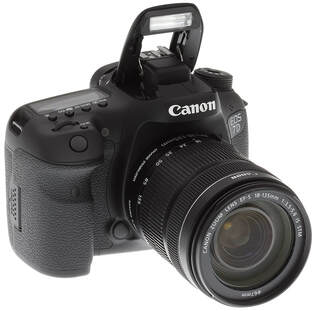 Canon EOS 7D Mark II Nikon D850: Although not exclusively a sports camera, the Nikon D850 offers a high resolution combined with good burst performance and solid autofocus, making it versatile for various photography needs including sports. 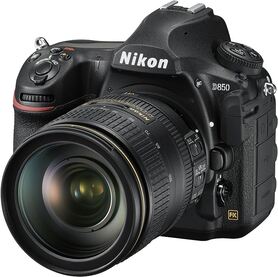 Nikon D850 Sony A1: Released after my last update, the Sony A1 is a high-end mirrorless camera with impressive specifications, including fast burst rates, advanced autofocus, and high resolution, making it suitable for demanding sports photography.  Sony A1 Remember that beyond the camera body, lenses play a crucial role in sports photography. Fast telephoto lenses with wide apertures are often essential to capture distant action and maintain fast shutter speeds. Additionally, features like fast and accurate autofocus, good low-light performance, and the camera's ability to handle high ISO settings are important considerations for sports photography.
Before making a decision, it's a good idea to try out cameras and lenses in a store if possible, and also read reviews and user experiences to find the equipment that best fits your needs and shooting style. Keep in mind that technology evolves rapidly, so newer models might have been released since this post. 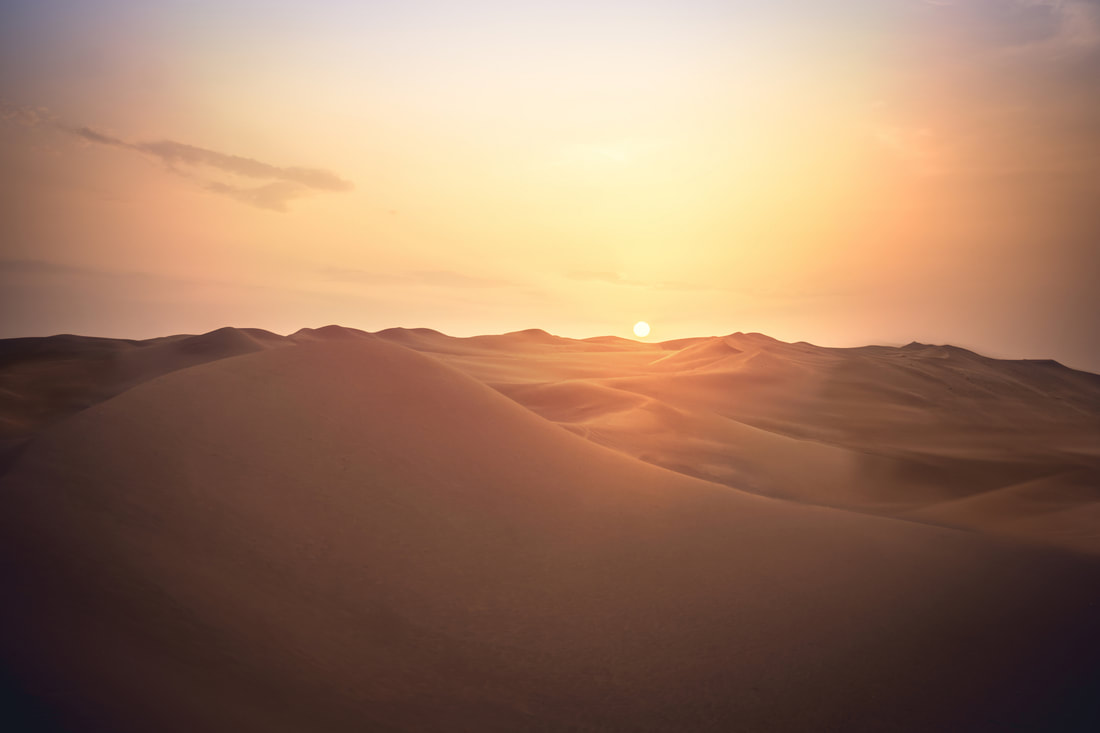 Photographer: Kirsten A. Harr, Location: Riyadh, Saudi Arabia There's nothing quite like a desert sunset.
As many photos as I took of the sun setting while we were in Saudi Arabia, I was never able to fully capture the magnitude and beauty of it. The large golden sun slowly drifting down behind the red sand dunes--one of my favorite things to witness. During the hardest times of COVID lockdown--in the blazing hot summer days--we would venture out in the evenings. We would often climb on the top of a hill and watch the sun drift away in the distance. So beautiful; so calm & peaceful. It was like therapy for my soul. And then our desert fox 'hunt' would commence. Oh yes, we would spend some time walking trails and looking for the elusive desert foxes that lived nearby. They were easier to spot in the evening and when there weren't as many people around. We spotted them a few times! These were some of the highlights that kept us going during some hard times. God's creations. 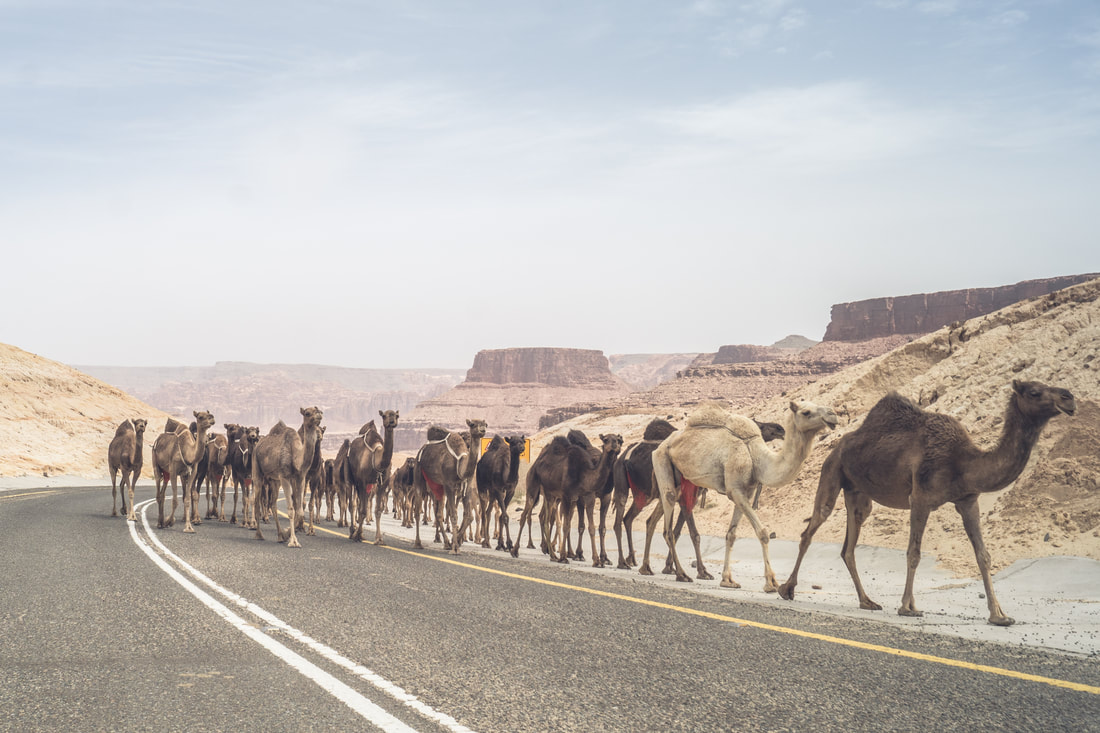 Photographer: Kirsten A. Harr, Location: Tabuk, Saudi Arabia One of our last trips in Saudi Arabia was to Tabuk--I'm kind of working my way backwards as I share photos from our time there. We drove all over the region as we explored and this may have been one of our favorite moments on our drive. The scenery was amazing and types rock formations changed every few miles. We were coming around a bend on a windy road and suddenly caught a glimpse of a herd of camels making their way up a hill. I grabbed my camera and captured the following images: 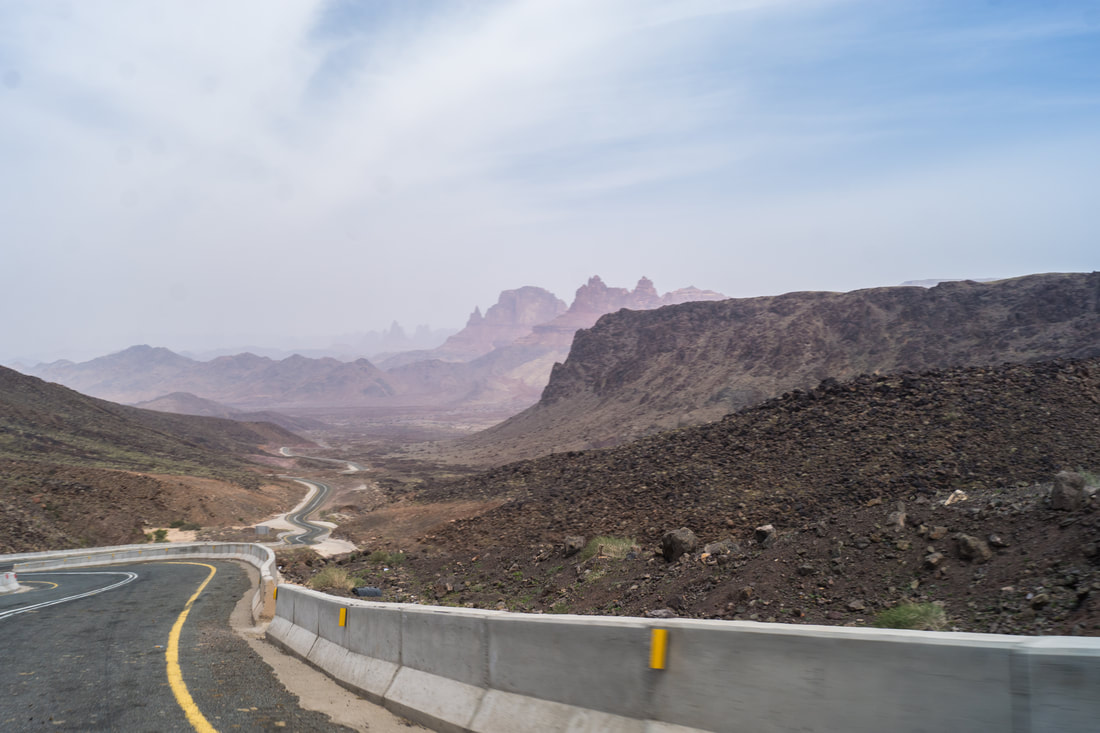 Coming Around the Bend. Photographer: Kirsten A. Harr, Location: Tabuk, Saudi Arabia 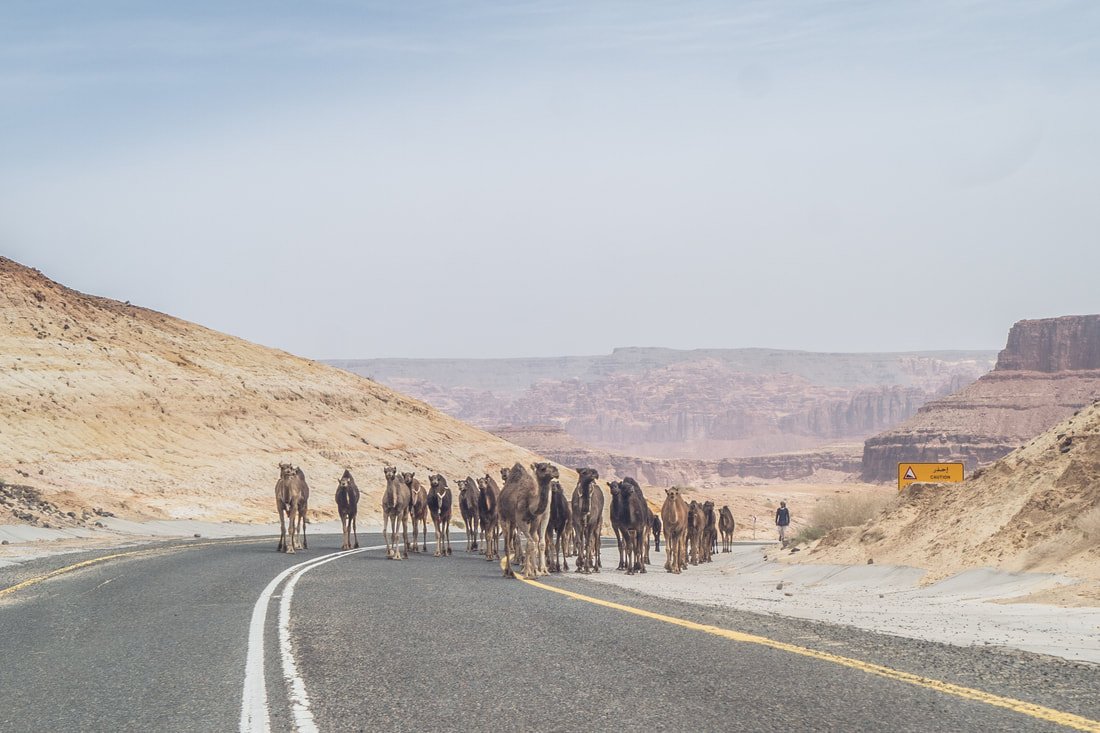 Photographer: Kirsten A. Harr, Location: Tabuk, Saudi Arabia Photographer: Kirsten A. Harr, Location: Tabuk, Saudi Arabia 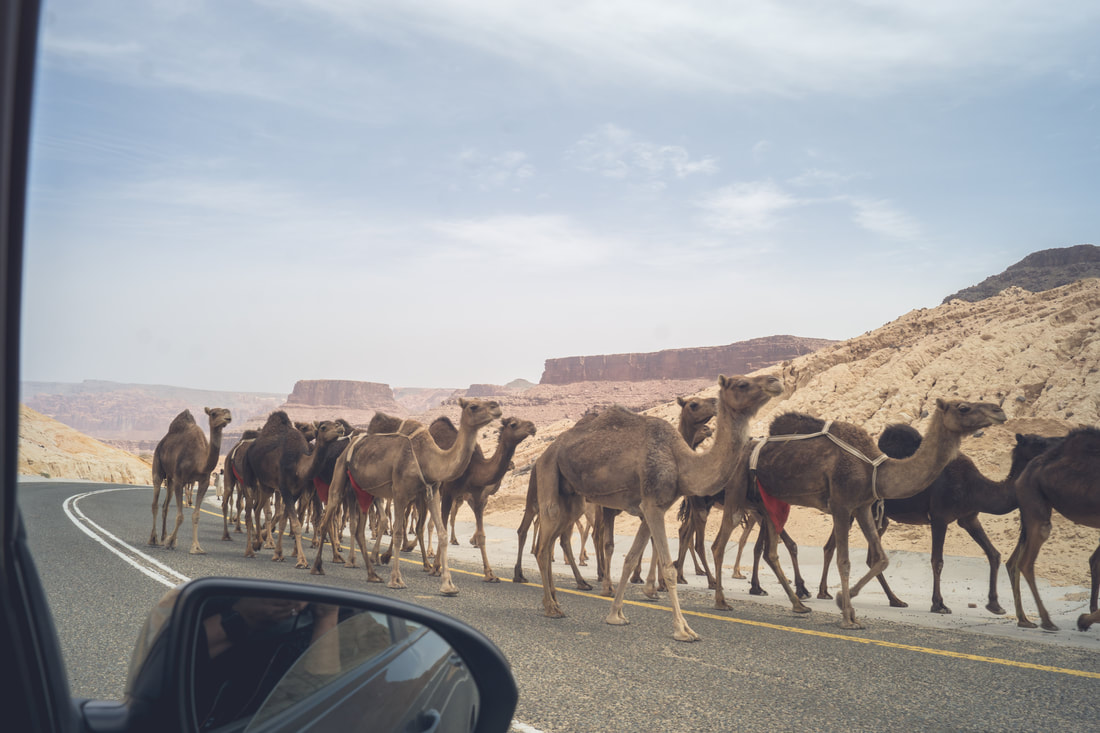 Photographer: Kirsten A. Harr, Location: Tabuk, Saudi Arabia 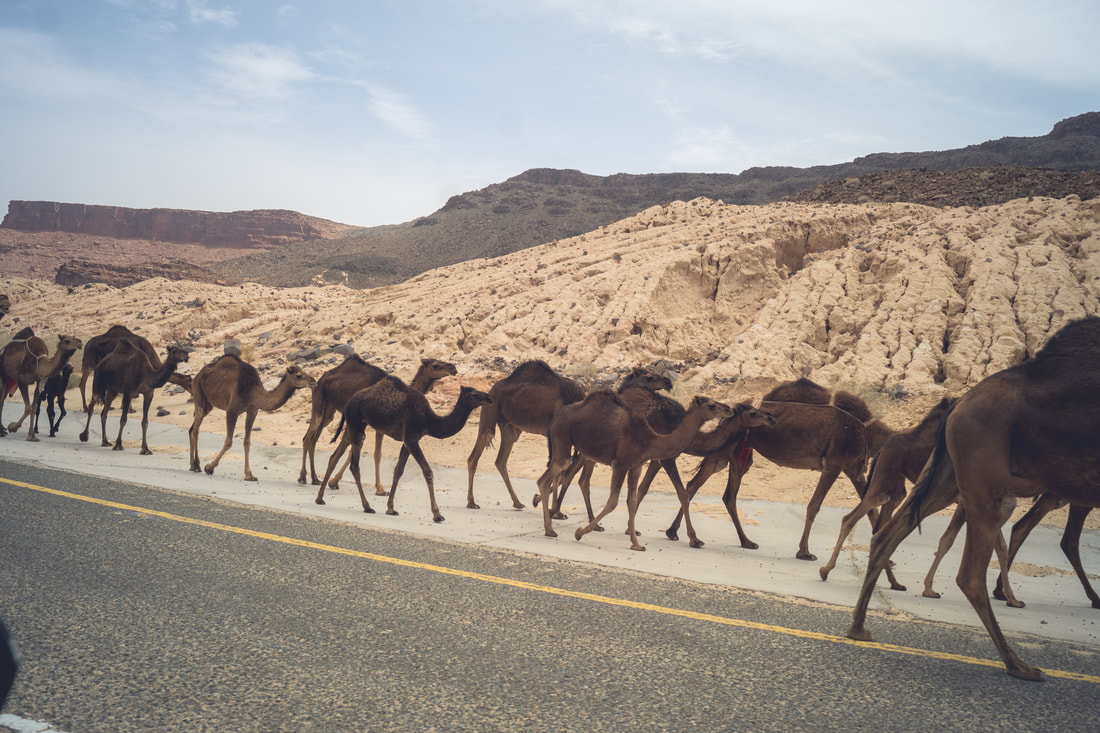 Photographer: Kirsten A. Harr, Location: Tabuk, Saudi Arabia We lived in Saudi Arabia for a few years and camel sightings never got old for me. Would you stop to photograph camels?
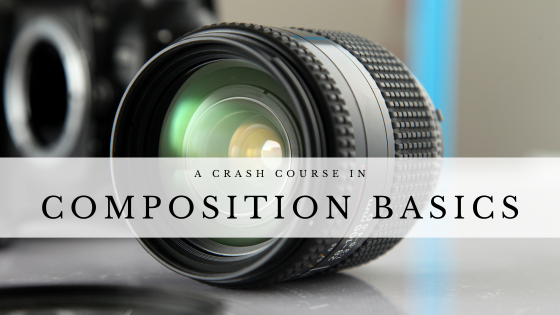 Photography composition is the arrangement of elements within a photograph to create visually appealing and engaging images. Understanding and applying composition basics can significantly enhance your photography. Here are some fundamental composition principles to keep in mind:
1. Rule of Thirds: Divide your image into a 3x3 grid by placing two equally spaced horizontal lines and two equally spaced vertical lines. Position key elements along these lines or at their intersections. This adds balance and interest to your composition. 2. Leading Lines: Use lines in your scene—such as roads, rivers, or fences—to lead the viewer's eye toward the main subject or focal point of the image. Leading lines can add depth and guide the viewer's gaze through the photograph. 3. Framing: Utilize natural or architectural elements in the scene to frame your subject. This can create a sense of depth and focus the viewer's attention on the subject within the frame. 4. Symmetry and Balance: Symmetrical compositions involve mirroring elements on either side of the frame, creating a sense of balance and harmony. Asymmetrical compositions achieve balance by using different-sized elements that have equal visual weight. 5. Negative Space: Negative space is the empty area around the main subject. Including ample negative space can emphasize the subject and evoke emotions, as well as add a sense of simplicity and elegance to the composition. 6. Filling the Frame: Fill the frame with your subject to create a bold and impactful image. This eliminates distractions and highlights the subject's details. 7. Patterns and Repetition: Patterns and repetition of shapes, colors, or textures can add visual interest to your composition. Capturing patterns can create a sense of rhythm and order within the image. 8. Golden Ratio (Fibonacci Spiral): Similar to the rule of thirds, the golden ratio involves placing key elements at specific points along a spiral that originates from the center of the frame. This can lead to a visually pleasing composition with a natural flow. 9. Depth and Layering: Create depth in your composition by including elements in the foreground, middle ground, and background. This adds dimension and a sense of distance to your photograph. 10. Point of View and Angle: Experiment with different angles and points of view. Shooting from low angles, high angles, or unconventional perspectives can offer unique compositions that stand out. 11. Rule of Odds: Odd numbers of elements tend to create more visually pleasing compositions. Instead of placing two or four subjects, try using three or five. 12. Visual Weight: Larger, brighter, or more detailed elements carry more visual weight. Place the most important element in a position of prominence to draw the viewer's attention. 13. Color and Contrast: Use color contrasts, such as complementary colors, to make elements stand out. High-contrast scenes can add drama and impact to your composition. Remember that these composition principles are not strict rules but guidelines to help you create compelling photographs. As you become more experienced, you can experiment and even break these rules creatively to achieve unique results. Practice, observation, and constant learning are key to mastering composition in photography. Some additional resources to help develop your photography skills:
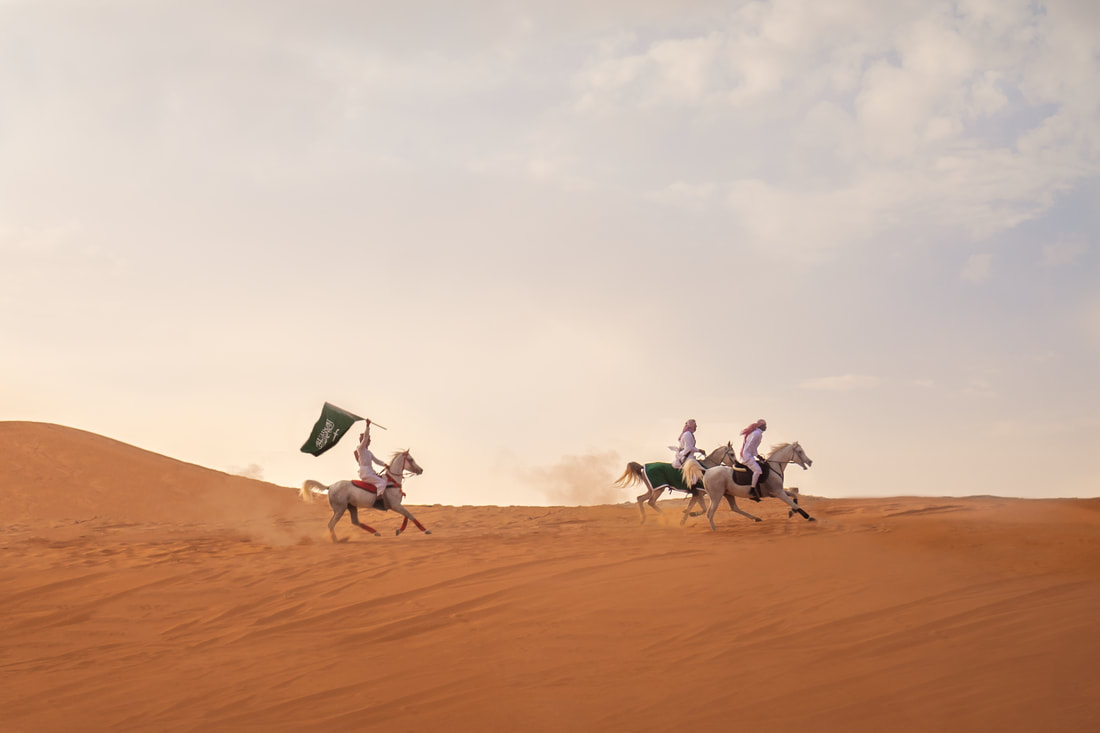 Photographer: Kirsten A. Harr, Location: Riyadh, Saudi Arabia Happy 2023! It's hard to believe it's 2023. I remember a moment in time in middle school, looking at a calendar on a text book and seeing my high school graduation year: 2001. At that time, 2001 felt like such a far away date. And now, we're 22 years past 2001. My mind is boggled with how quickly time goes.
I'm now living in Hawaii with my family after almost 3 years in Saudi Arabia--which is also equally mind boggling. What a change in climate and scenery, though both have lots of sand and palms. We really enjoyed our time in Saudi Arabia and I took a lot of pictures. Mostly unshared.. As I reflect on our time there and on what our time will look like here, I'm inspired to share more photos from Saudi Arabia and our travels while we lived there. I will confess, moves can be hard for me. Especially when it comes to photography. I'll snap many phone pictures, but it tends to take me a couple of months to pull out my camera. Well, my camera is now out and in use here in Hawaii. I've not restarted my portrait business..yet, but I'm inspired to share photos from our time here. I'm looking forward to all 2023 has to offer. I hope you are too!  Understanding camera settings is crucial for taking full control of your photography and capturing the images you envision. Need a crash course in camera settings? Here's an overview of the key camera settings you should be familiar with:
1. Shooting Modes:
Here are additional resources that can help you to continue to develop your photography skills:
 Anyone who knows me or has seen my portrait work, knows that I love a good posed photograph. The subject seated a certain way, making eye-contact with a smile (or not) can make for a powerful and moving photograph. But, I also adore a candid photograph. I love them when the subject has no clue you're photographing them. Like you're hiding in the bushes in a non-stalker/non-creeper kind of way, of course. But, I also love a candid photograph where the subject knows you're there with a camera, but you (as the photographer) just let them do what they want. And my favorite subjects to photograph this way are children! Not everyone likes this, I understand. I think some parents are afraid of what their child might do. Maybe they're afraid of capturing an image of them with a grimace, scowl...or even in a full-on tantrum. But oh the joy of all of those things--yes, even the tantrum. Why joy in a tantrum? Because there's so much beauty in the normal & natural things of life. The times that are fleeting. The images that can only be recalled in the mind's eye of memories or in photographs. If you're all in favor of a posed photograph, I'm with you...I love them! But, let's see if I can encourage you to try a candid photo or two of your little one. Here are 3 reasons you should get candid photos of your kiddo: 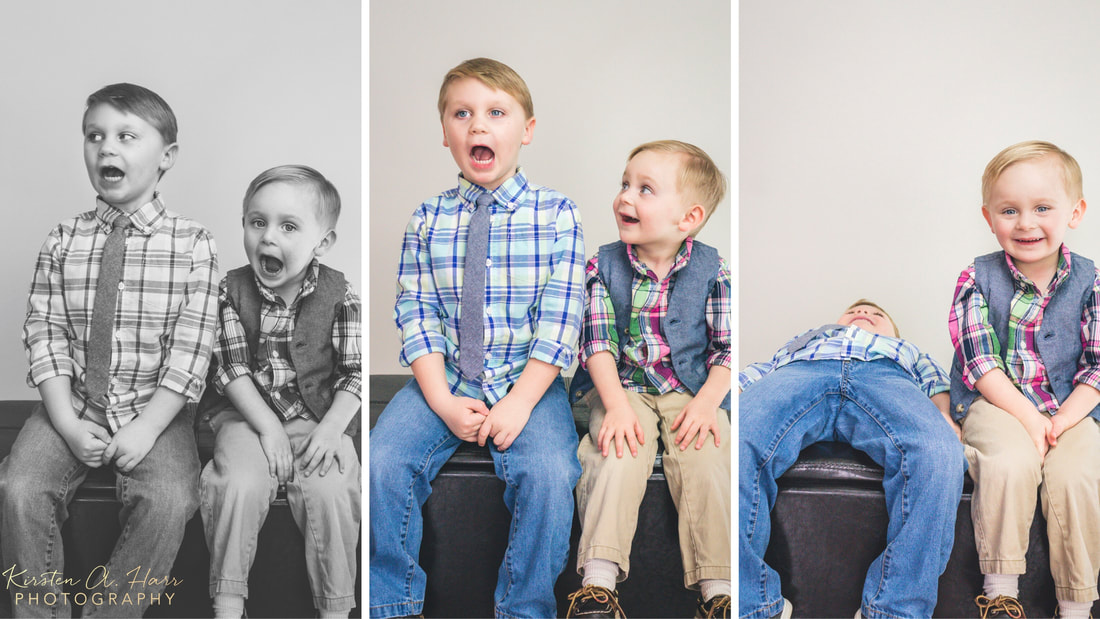 1. Capture your child's personality as it is today. Any parent knows that time with your child flies by. One minute, they're born, and the next minute, they're driving. I'm in the stages between born and driving, but time is flying by, nonetheless. As children grow and develop, their personalities do too. Capturing candid photos of my son now at 6 is much different than candid photos of him when he was 2 or three. I look at the photos of when he was a toddler and remember how focused he was on the details of toys. Yes, he's still focused now, but it's different--he's changing, and photographs have helped me capture these changes to relive and remember them. 2. Have fun and memorable photos to adorn your walls. Okay, I'm just gonna say it. Photos can get a little boring and old if everyone looks the same in ALL of them. You know what I'm talking about! "Everyone look at the camera and smile!!!"...times 100. Again, I love a posed photograph, I take posed photographs, I have these photos hanging on my wall. But those candid photographs can really spice up a wall with personality and the unique flare that is your child. And, they make for more entertaining and provoke conversation with your children as they recall the moments and with guests who enter your home.  3. They will amaze you. Without direction or guidance, you'll be amazed at how your child responds to photographs. Will they smile? Will they cry? Will they stare? Who knows. My favorite thing to do is just photograph a child for a few shots without saying anything to them. To just see what they say or do or what they don't say or don't do. To see where they'll look or what they'll find interest in. It's fascinating and makes for more natural feeling photographs. After some time, I'll give direction an get some posed photos. But, I've found that parents are fascinated by the expressions their little ones give on their own...without my guidance and direction.  So, are you ready to get out there and capture some candid photos of your children? I hope so! Or maybe you already do? Share what you're photographing with me below in the comments. I'd love to connect!
-Kirsten |

|
Hi there! I'm a portrait photographer currently based in Oahu, Hawaii. I specialize in family, pet & professional portraits. Thank you so much for coming to visit me here!
|
Some of the links on this website are affiliate links, which means that I may earn a commission if you click on the link or make a purchase using the link. When you make a purchase, the price you pay will be the same whether you use the affiliate link or go directly to the vendor's website using a non-affiliate link. By using the affiliate links, you are helping support Kirsten A. Harr Photography, and I genuinely appreciate your support.

|