Kirsten A. Harr Photography Blog
|
Some of the links on this website are affiliate links, which means that I may earn a commission if you click on the link or make a purchase using the link. When you make a purchase, the price you pay will be the same whether you use the affiliate link or go directly to the vendor's website using a non-affiliate link. By using the affiliate links, you are helping support Kirsten A. Harr Photography, and I genuinely appreciate your support.
|
|
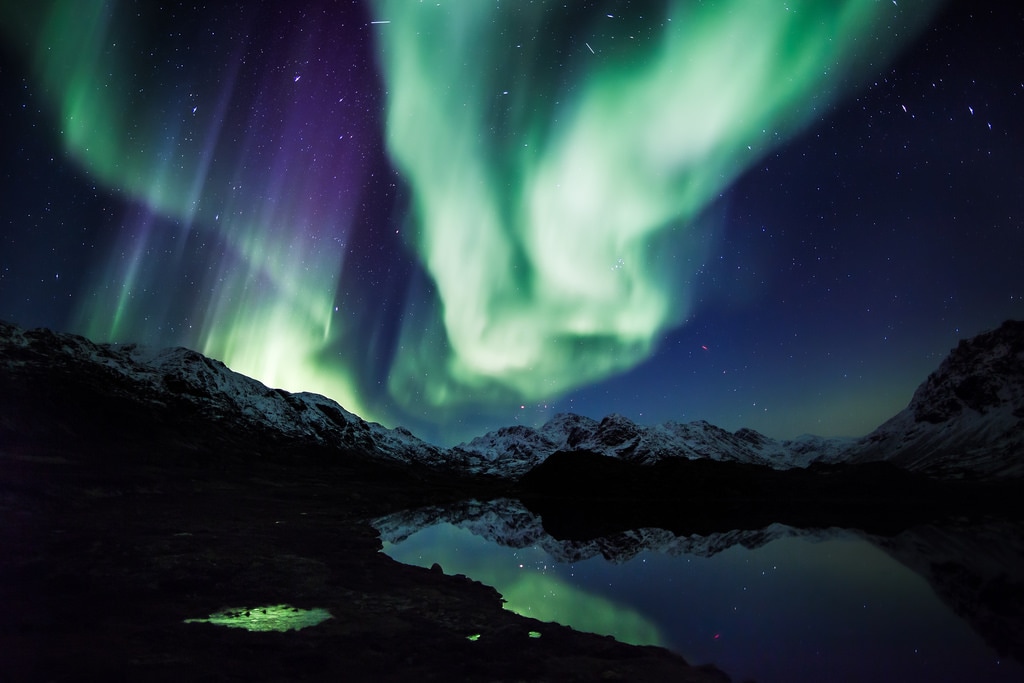
If you’ve ever considered traveling to Iceland to photograph aurora borealis (also known as the Northern Lights), there is one crucial thing you should know before going: aurora borealis is quite elusive and unpredictable—even in Iceland. Even if you visit Iceland between September and April, when your chances of catching a glimpse the lights is drastically higher, it’s truly a hunt to find the Northern Lights. Aurora borealis is sporadic and completely dependent on the frequency and strength of solar flares that come in contact with the Earth. What does that mean? It means you can’t truly plan the exact moment you’ll see the lights—so, it’s crucial to be fully prepared to capture your photographs at any moment.
To ensure you’re ready to capture star-studded images of the Northern Lights through your lens when you happen upon the right place at the right time, make sure you’re equipped with the right gear. Let’s start with the camera. I recommend using a full frame DSLR with manual mode that can handle an ISO of 3200 to 6400. To capture the perfect pictures of the Northern Lights, you’ll want to be in very low light, avoiding man-made light sources and away from highly populated areas that produce light pollution. Consequently, you’ll want to have your aperture between f/2.8 and f/5.6 and your shutter speed between 15 seconds and 30 seconds. The lights dance in the sky, so the faster the lights are moving, the shorter the shutter speed should be. Because the intensity of the lights and amount of movement is constantly changing, experimenting with settings is important; you will definitely want to have your camera in full manual mode. Depending on the light conditions on the night you’re shooting, be prepared to make adjustments to your settings if your images end up slightly overexposed or underexposed. And let’s not forget about your lens. You’ll want to have something fast with a relatively wide angle. A focal length of 16mm is great, but a 24mm prime lens will work just as well. You will also want a lens that will give you the ability to incorporate the dark night sky for contrast and scale. To get a nice crisp image, remember to take all filters off of your lenses before shooting--including your UV filter. Additional but necessary pieces of equipment to have with you are: a tripod, a remote, and extra batteries. A sturdy tripod and remote will let you shoot long exposures without risk of the camera shaking. I recommend having two to three extra camera batteries. The cold temperatures in Iceland will cause your batteries to drain faster, and you’ll want extra battery life on hand as you wait patiently for the lights to appear. You may also want to consider bringing a headlamp with a red light so you can make adjustments to our camera settings without ruining your night vision. Remember, every interaction with the Northern Lights is unique, which means there’s no “perfect camera setting” to capture them. So, the best way to prepare for your quest to capture the Northern Lights is to practice and hone your nighttime photography skills. A great way to practice is to check out the weather forecast in your local area, pick a clear night, grab your gear, drive to a dark, unlit space (a wide open field will work well), snap pictures of the nighttime sky and prepare for your meeting with the Northern Lights. Happy Snapping! Kirsten
0 Comments
Leave a Reply. |
|
|
Hi there! I'm a portrait photographer currently based in Oahu, Hawaii. I specialize in family, pet & professional portraits. Thank you so much for coming to visit me here!
|
Some of the links on this website are affiliate links, which means that I may earn a commission if you click on the link or make a purchase using the link. When you make a purchase, the price you pay will be the same whether you use the affiliate link or go directly to the vendor's website using a non-affiliate link. By using the affiliate links, you are helping support Kirsten A. Harr Photography, and I genuinely appreciate your support.
|


